1) Right Click the C-Venture App folder and click on browse and you will get this page which shows No company created refer to figure 2.1
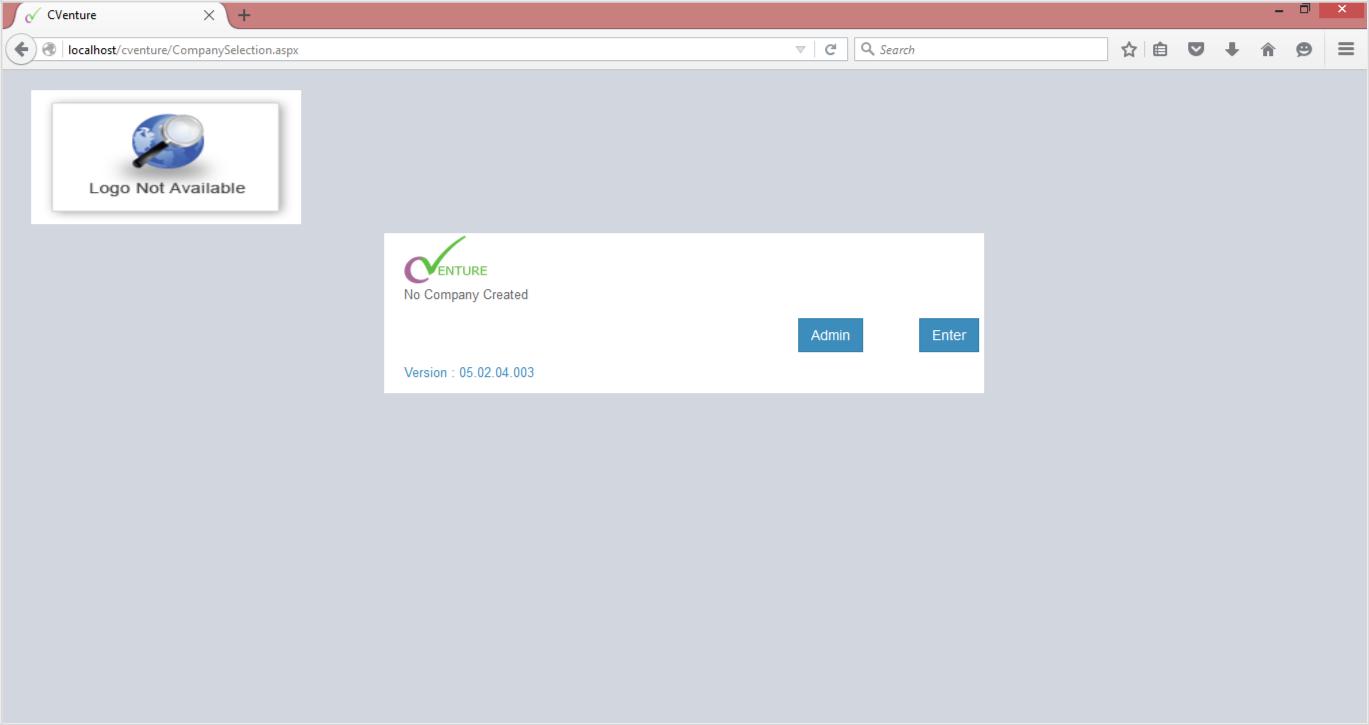
Fig.2.1
Note :- There are two types of admin. One is application admin. And other is the admin of the company. To go to application admin you need to click the Admin button on the login page and to go to company admin you need to select company which you want to manage and then use admin credentials
Click on ‘Admin’ button you will get a login page refer to figure 2.2
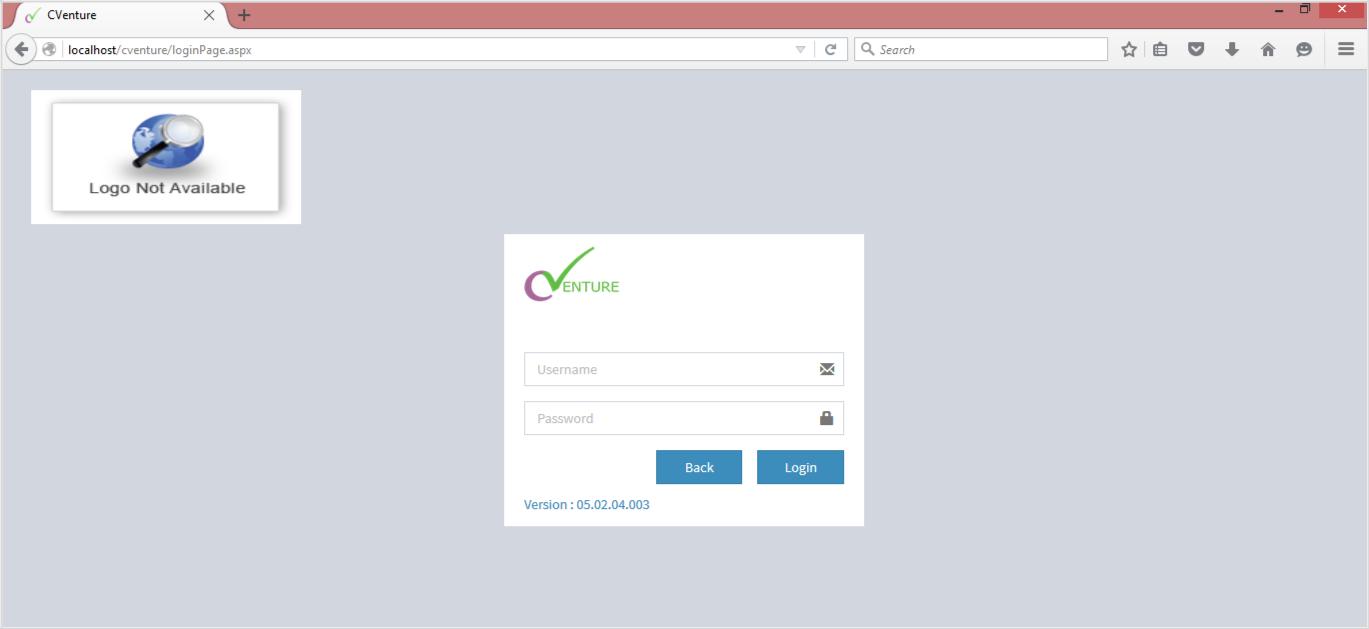
Fig.2.2
Enter username as ‘admin’ and password as ‘admin’ and Click on login. Refer to figure 2.3 . Also remember to change your main admin password
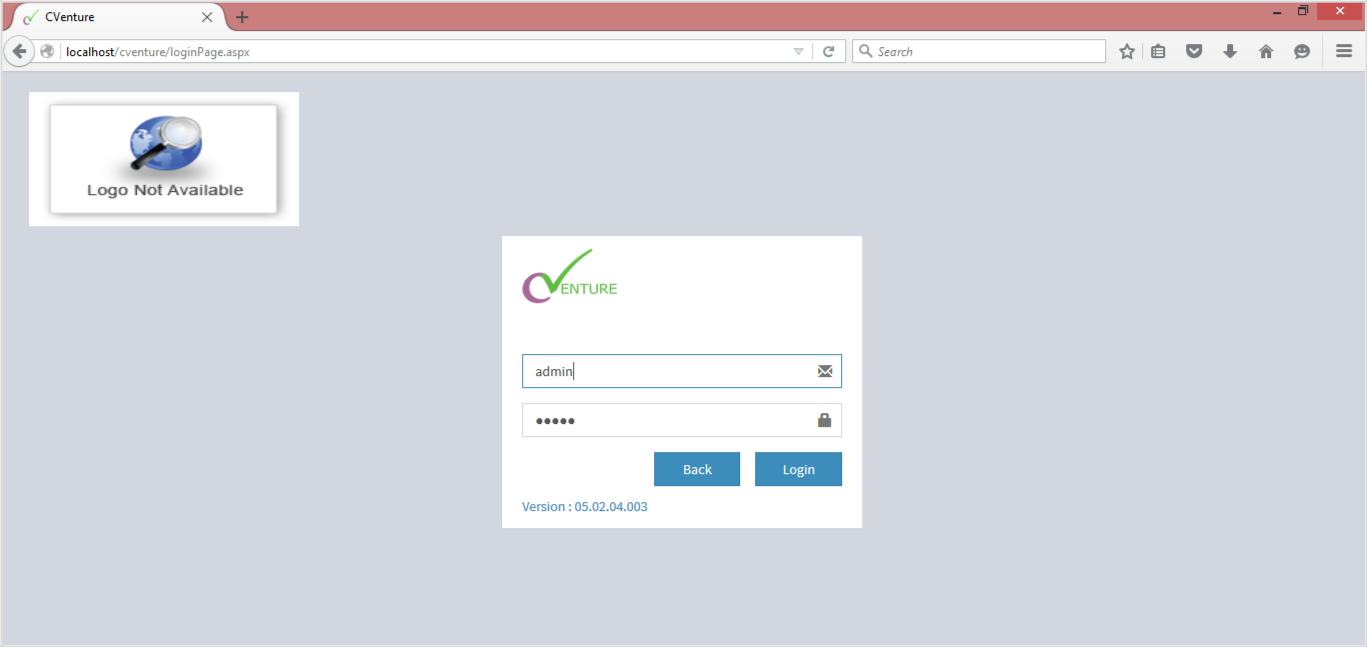
Fig.2.3
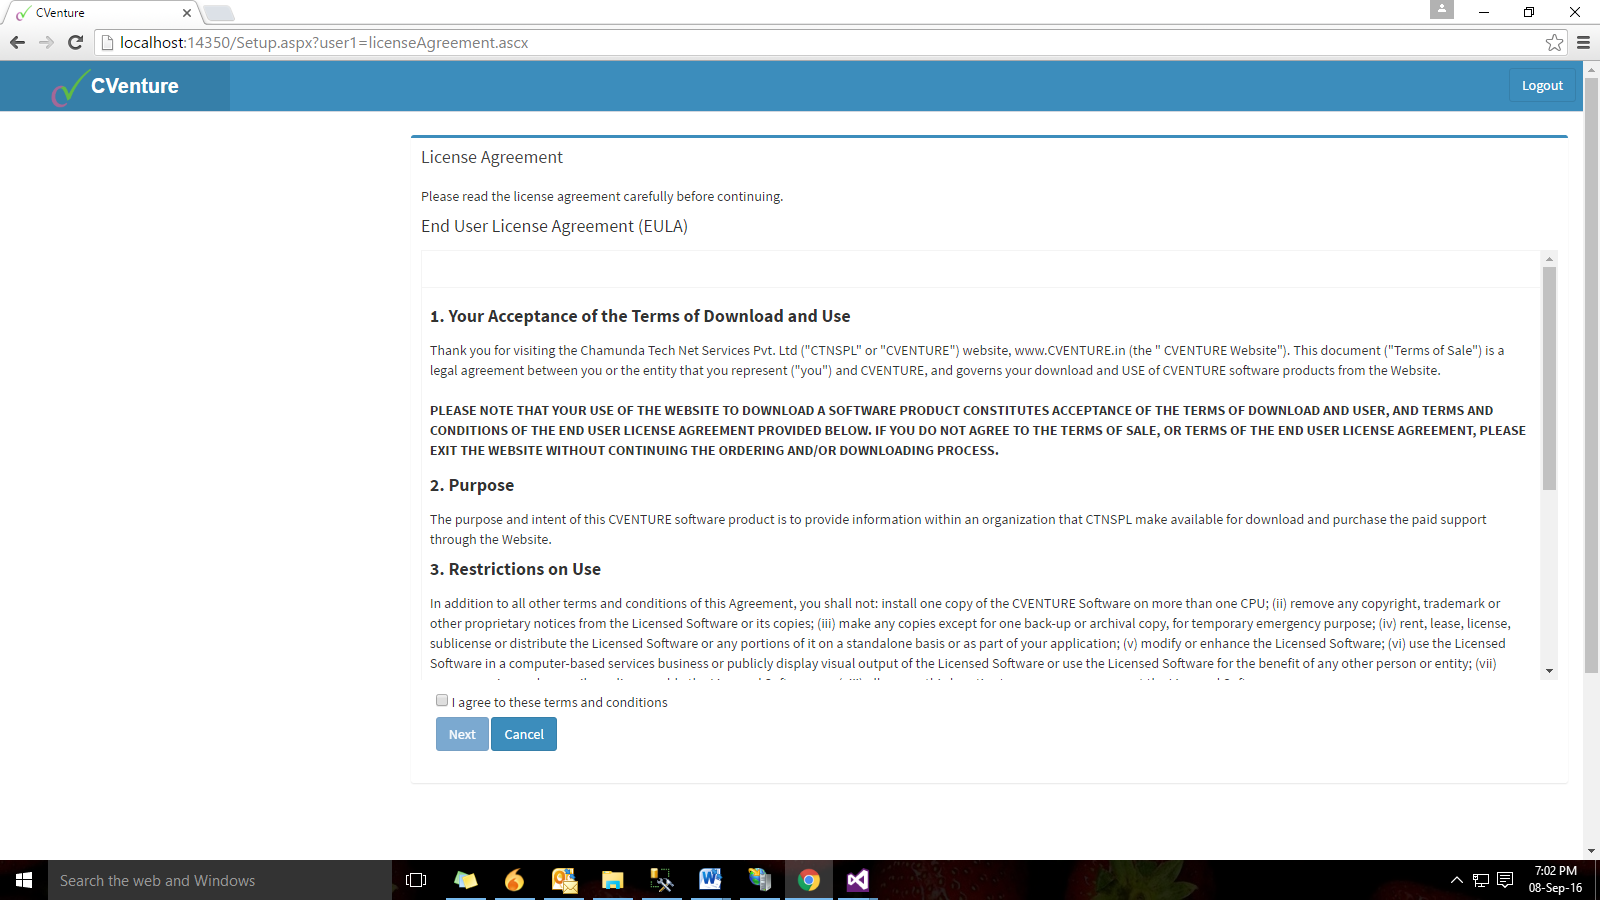
After login you will get the End User License Agreement (EULA) where you need to accept the terms and condition for further setup process.
When you accept the terms and condition click next to go to Company Information page where you have to enter the license key which you have got from the registration on Cventure.in website. Enter ‘license key’ and click on “Update License” refer to figure 2.4
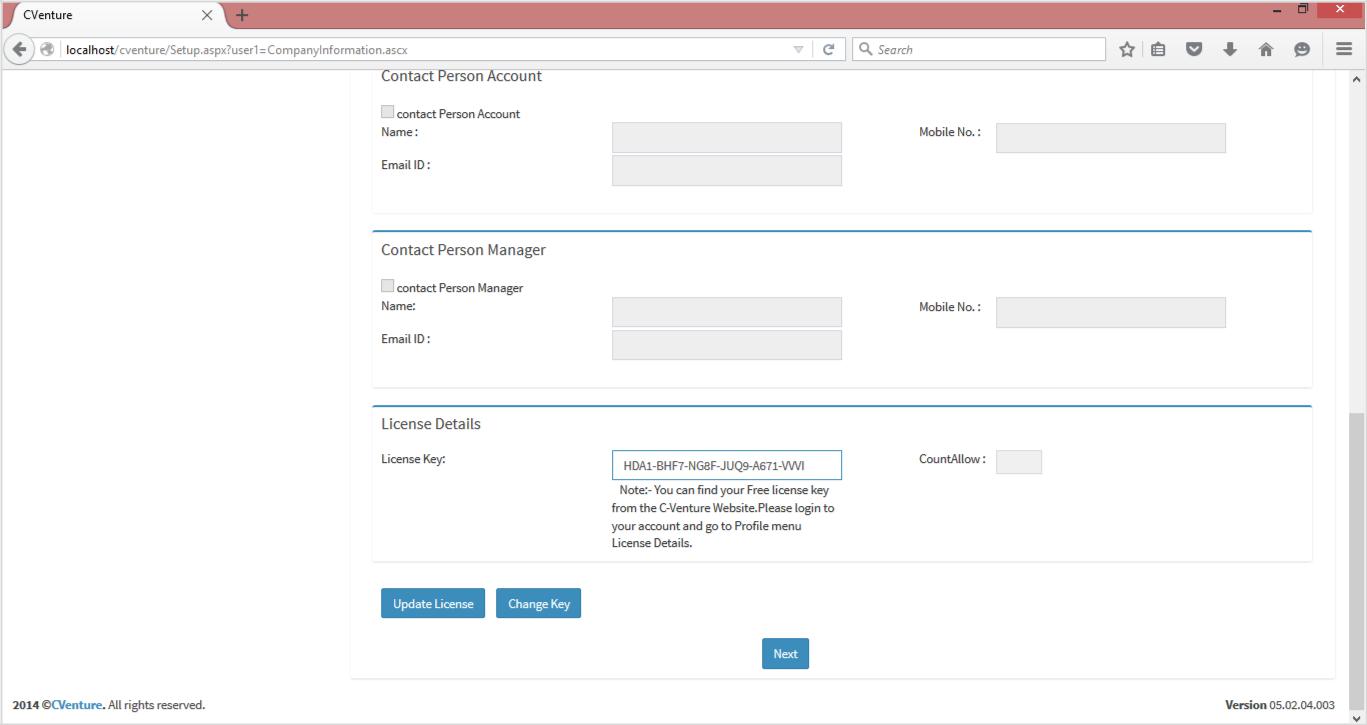
Fig. 2.4
Click on Next. You will be redirected to Create Company details page. As shown below in figure 2.5
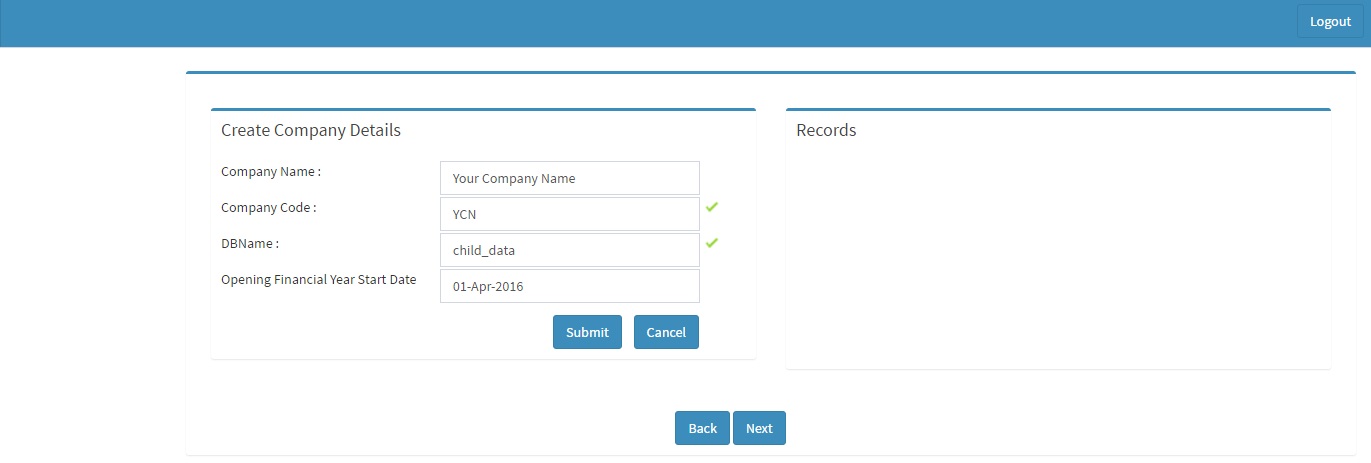
Fig. 2.5
Enter the Company details and Click on Submit refer to figure 2.6
You will get the confirmation ‘Database Created Successfully’ Click on OK. Refer to figure 2.7
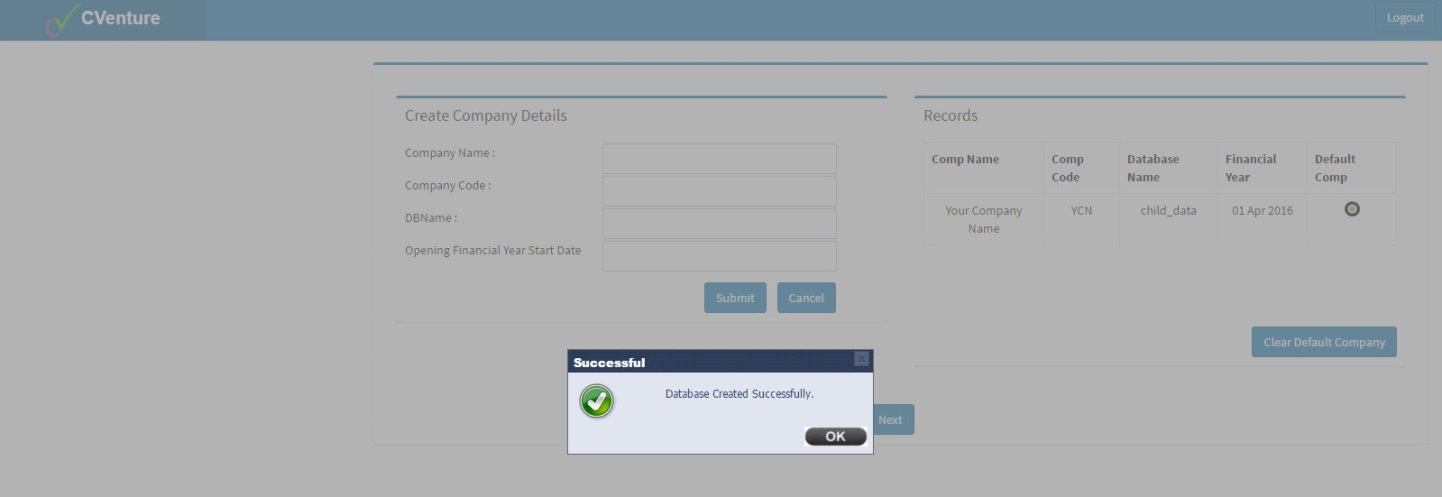
Fig. 2.6
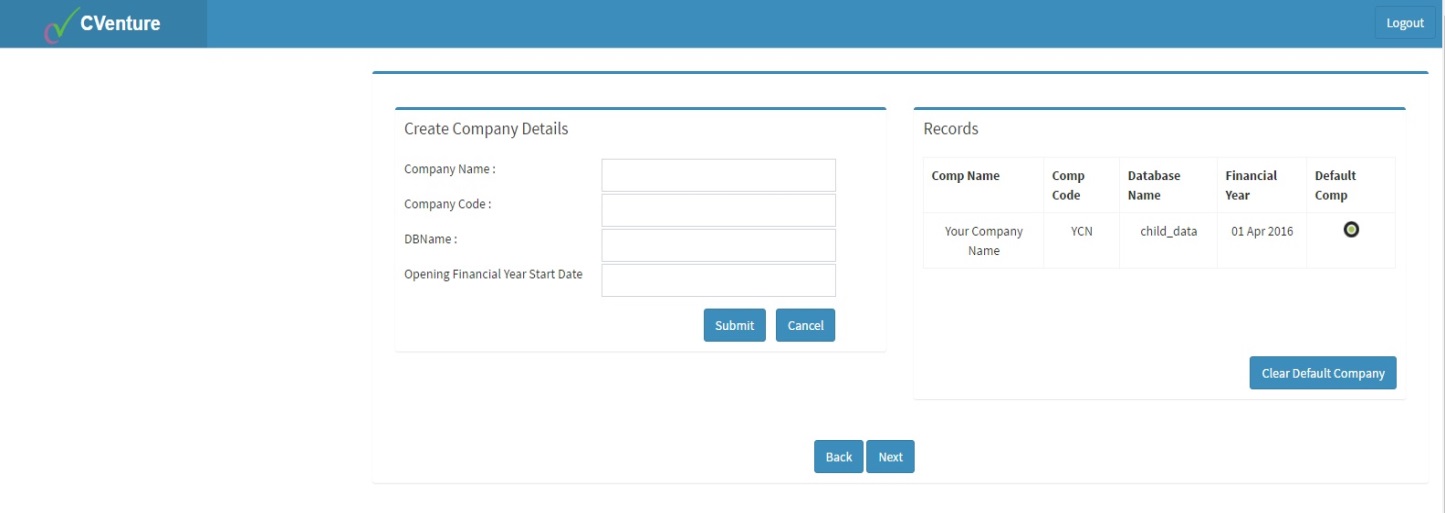
Fig. 2.7
Once the company is created you can now proceed to setup new company… Click Next to exit from Application admin. Whenever you login to the company admin it takes you to company setup until it is completed. By default it takes you to login page of the default company set during the company creation process refer to figure 2.7
2) Company Setup
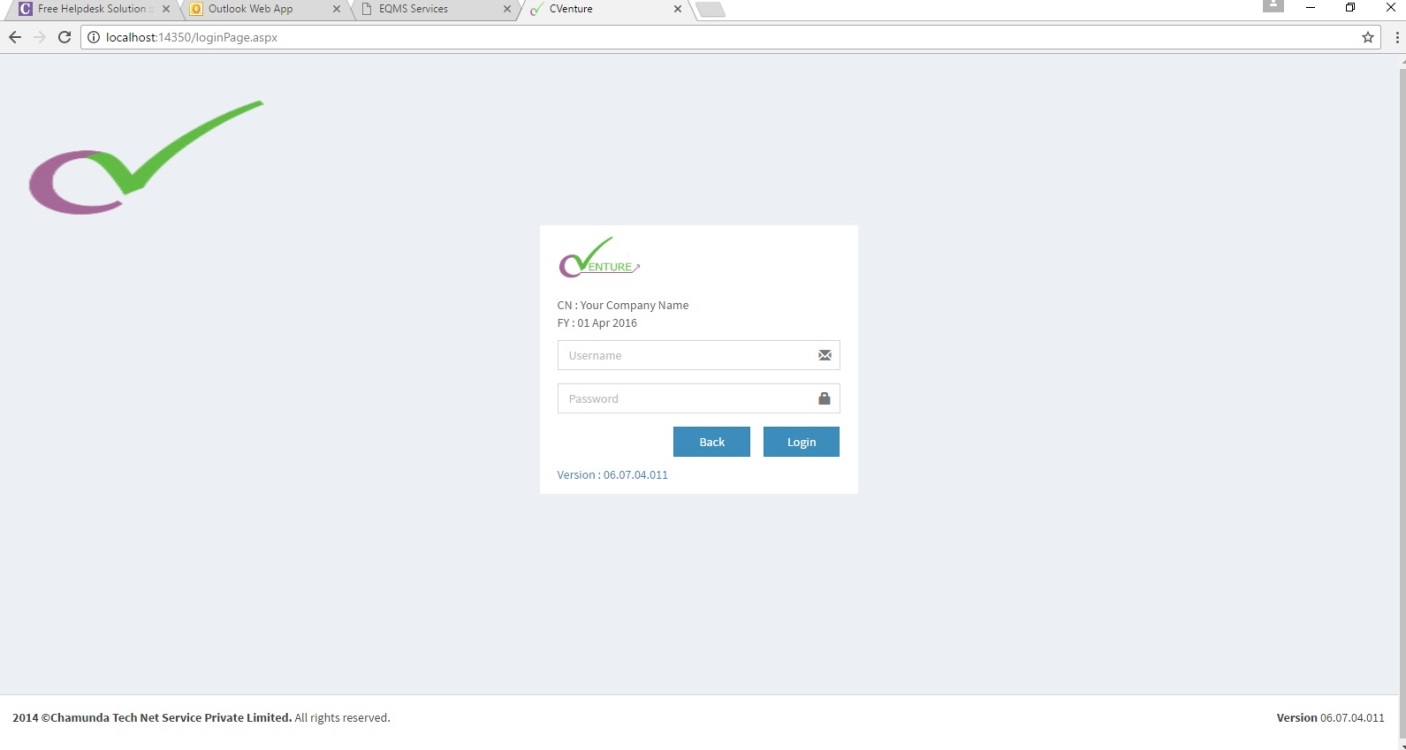
Fig. 2.8
We can use back button to go back to company selection refer to figure 2.8 and on back click you will get the companies created, refer to figure 2.9.
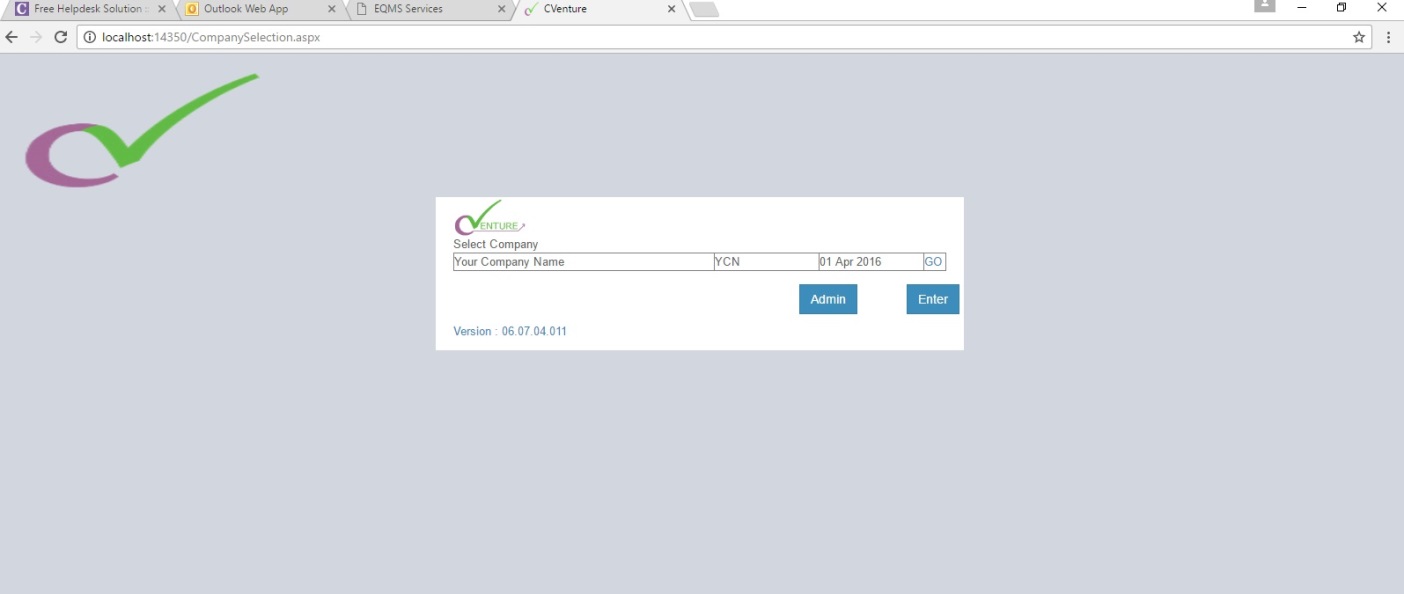
Fig. 2.9
Here you can select any company and press enter button or you can directly go to the company from click on GO. And you can go to the company’s admin section to set the settings about company refer to figure 2.10
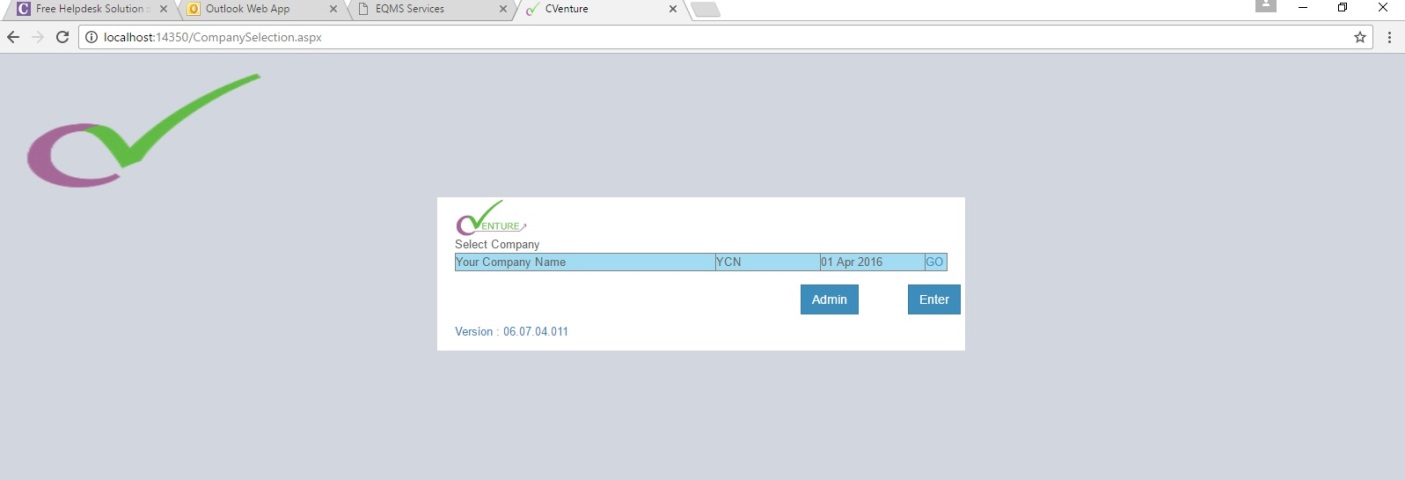
Fig. 2.10
Select Company Name and click on go to the login page refer to figure 2.10

Fig. 2.11
Enter Username as ’admin’ and Password as ‘admin’ and click on login button refer to figure 2.11
Note :- This is the default password of any company that you create.. You should change the company admin password .
You will get a Company Details page. Enter the following details and click on ‘Submit’ refer to figure 2.12